Modo to Substance Painter
This story is also on medium which may or may not provide a better reading experience ¯\(ツ)/¯
Modo is totally awesome. I use it for everything except texture painting because Allegorithmic is the king of that neighborhood. No doubt about it.
Modo has lots of awesome features and shader techniques as well as procedural modelling techniques that you can only use inside of modo. Trying to export a lot of that stuff out and freeze it down is an unnecessary step and prone to lots of errors. It should be cut from the pipeline. As cool as xNormal is if you’re using modo bake in modo and save yourself a huge hassle.
Starting out
There is a small amount of setup that must be done each time. Rather than use any sort of bake wizard, lets just go through each part and analyze them.
Substance Painter only needs a few maps and then it can bake the rest of them from those maps. I see no reason to bake them all in modo. Substances baker is a bit faster when it comes to rendering those maps, so lets go for speed here because painter allows us to iterate and change our model rebake and jump back and forth lots of times so we should use that to our advantage. Speed is king here.
Maps Needed:
- Tangent Space Normal Map
- Ambient Occlusion Map
- Thickness Map
- ID Map
Tangent Space Normal Map
Creating a normal map is very simple.
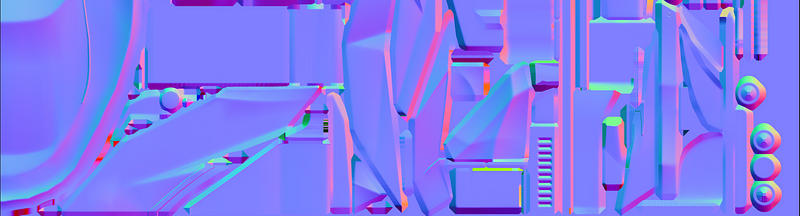
Normal Map
- Create a new image named NRM and add it to the low poly material set the effect as Normal
- Add a Texture Bake Item and name it Normal Bake
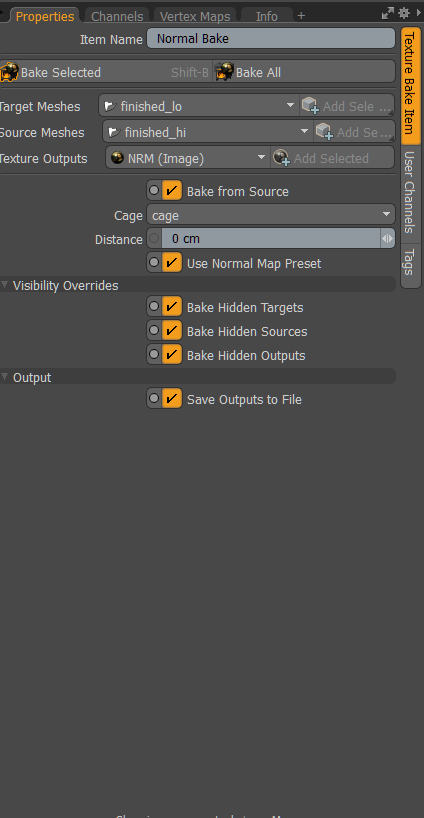
Texture Bake Item Settings
- Target Meshes should be the low poly meshes you want to bake to. Put these in a group to make it easy.
- Source Meshes are your hi poly meshes you want to bake from. Put these in a group to make it easy
- Texture Outputs should be the image named NRM we created and set as our low poly normal map in the material.
- Bake From Source should be ticked
- Cage is the morph you created that is to be used as the cage for the normal map baking process.
- Distance is ignored if we use a cage so leave that alone. I always use a cage.
- Use Normal Map Preset should be checked.
- Save Outputs To File should be ticked the rest are optional
Ambient Occlusion Map
Modo has a quick fast Ambient Occlusion output you can use.

Ambient Occlusion Map
- Add a Render Output Bake Item and name it AO Bake
- Add a Render Output and name it AO Change the effect to Ambient Occlusion
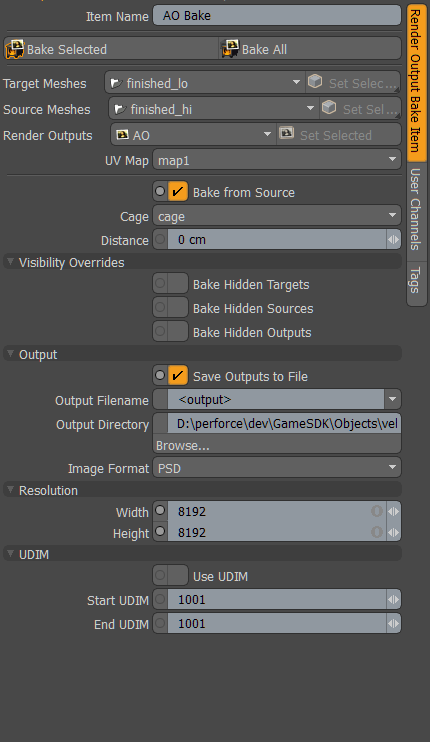
AO Render Bake Item Settings
- Target Meshes Low poly Meshes
- Source Meshes Hi Poly Meshes
- Render Outputs Select the AO Render output we created
- Bake From Source Ticked
- Cage Cage Morph Map
- Distance ignore
- Save Outputs To File should be ticked the rest are optional
- Output Filename
- Output Directory where to store the output
- Image Format whatever you want
- Resolution Texture resolution use a small resolution for testing
Thickness Map
Thickness takes a very long time to bake and requires a few tweaks from the default occlusion shader.

Thickness Map
- Add a Render Output Bake Item and name it Thickness Bake
- Add a Render Output and name it THK Set the effect to Driver A
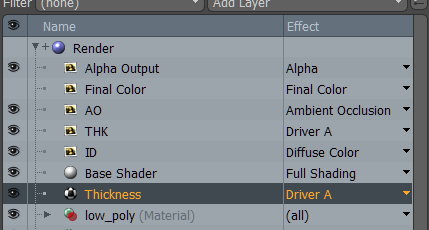
Thickness Shader Settings
- Create an Occlusion Material (Add Layer -> Processing -> Occlusion) near the top of the stack after the Render Outputs and Name it Thickness
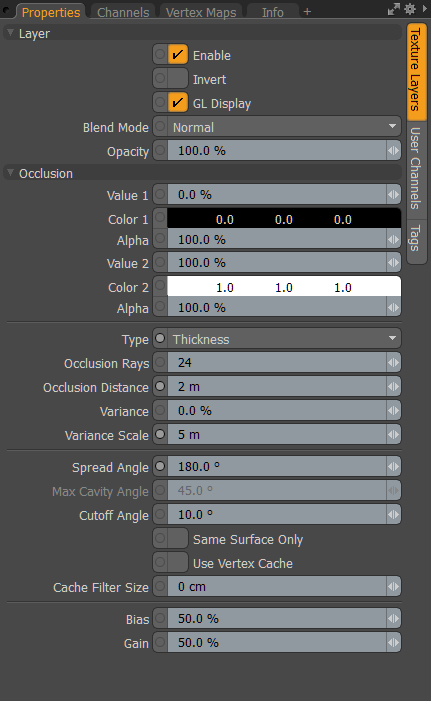
- Change the effect on the Thickness to Driver A
- Type change from Uniform to Thickness
- Occlusion Distance adjust based on size of model
- Spread Angle to 180 degrees
- Cutoff Angle adjust as needed from between 1 and 10
ID Map
There are two quick ways to do this an automatic way and a manual way.
ID Map
Automatic:
Surface ID all the way.
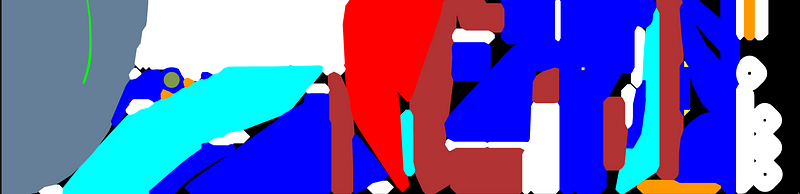
Manual:
Diffuse Color is your friend here. In my case I use a little script I wrote to quickly assign colors to meshes but if you already have it set up it’s just as easy to start using this.
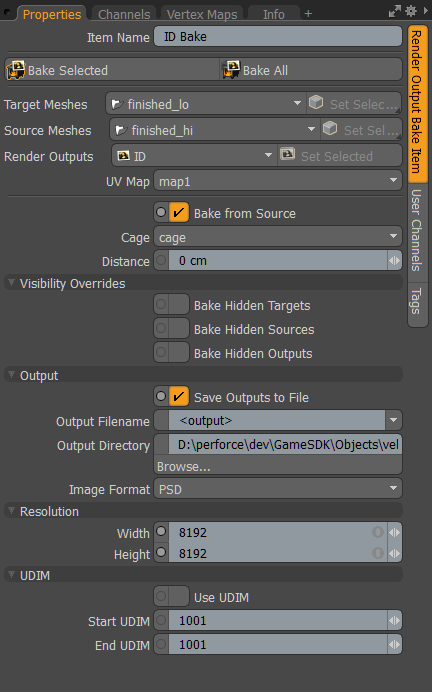
- Add a Render Output Bake Item and name it ID Bake
- Add a Render Output and name it ID set the effect to Diffuse Color if you have manually set your diffuse colors on your hi poly materials or Surface ID if you have some preexisting materials you want to use
- Use all the same settings as the AO/THK Bake items we created earlier.
Baking the Maps
Ok so we’ve created all the Bake Items we need and we’re ready to go. The next step is to click the Bake Select item button in any one of the Bake items we created. Wait for the bake to complete. For the normal map you can either save it from the render output window or right click on the clip in the Clip Browser and select Save and then Reload. The AO, THK, ID will all save automatically where you told them to.
Exporting the mesh
This can be a real pain in the ass because there are a lot of different options to choose from. Fortunately with the latest updates and software evolving as it does the FBX 2018 exporter works really well here.
Now that normals are a part of modo from a native standpoint your surface normals should always nicely match up when importing it into substance painter or other 3d software like Maya or Max.
Inside Painter
Now that we’ve baked our maps and exported our low poly mesh, we’re in a position to start playing around with our base materials. I make it a rule to try and do 90% of the work procedurally and only at the very last part of the project do I come in and do non-procedural dirty things like hand painting and beauty passess. Needs change in production as well as often times understanding of what you were even supposed to be doing in the first place. Other times you pour your heart into a project only to find out you have a major geometry issue to deal with. Using modo and substance painter this is super easy IF you stayed as procedural as possible in your material creation. Once everyone is happy with how it looks and feels in game then you can always do the final 10% of “arting by hand”.
So lets import the mesh ya?
Create a new project
In my case I am always going to CRYENGINE as my game engine. So I’ll focus on that. The options should only vary mildly for other uses cases so try and use your head and figure out what’s best.
Import all of your baked maps we created in modo and then select the Bake Textures button from within Substance Painter. Deselect all the maps we’ve already baked, set your bake size to 4096x4096 and click bake. Now you’re ready to work on your model.
Material Groups
After everything is imported it’s time to start creating groups of materials that correspond to your id map color.
I find that the default color mask selection utility in substance painter is a bit lacking, fortunately Substance Share is a great resource for finding substance stuff so a quick look there and I found the awesome Color Mask Generator by Will Fuller.
It really helps to smooth out lots of little small errors. One feature I use all the time is the pixel fill.
It is a bit of a pain to get it set up so I’ll go over quickly how to use it. I always add a fill layer at the very top of the stack and set the diffuse to the ID Map from modo we imported. This makes it easy to select a color for the mask generator by turning on the layer and viewing only the diffuse channel and color picking the color in the viewport.
- Create a Group Folder
- Name the group something descriptive (Painted Steel, Rough Plastic)
- Add a black mask to the group
- Add a generator to the group mask
- Select the Color Mask Generator
- Choose the ID Map from modo for the ID input.
- Select the color and active the ID Layer we created at the top of the stack to color pick the right color.
- Adjust the Tolerance level
- Give it a slight pixel fill if needed
There and Back Again
So now lets say after we’ve been working on our textures in Substance painter that we want to make a model change or the art director wanted some change made. We’re screwed right?
Nope.
As long as your ID’s don’t change you can quickly and easily bake all of your textures again after changing your model. Export the model and reload all of your changes inside of substance painter. It will reproject all of the work you’ve done and in many cases (assuming the size of the model doesn’t change) keep your hand painted strokes. (This is why I always save any hand painting for when I know for a fact the model will not change)
Hopefully this guide is helpful. I’ll include the video as soon as it’s ready in the future.